Jbuilder is a fully-fledged IDE (integrated development environment). It has a lot more features and functionality than a standard text editor, but it also requires a little more effort to get started. This tutorial is divided up into two sections. The first part tells you how to set up JBuilder for use in this class. This only has to be done once. The steps in the second section tell you what you need to do each time you write a new program.
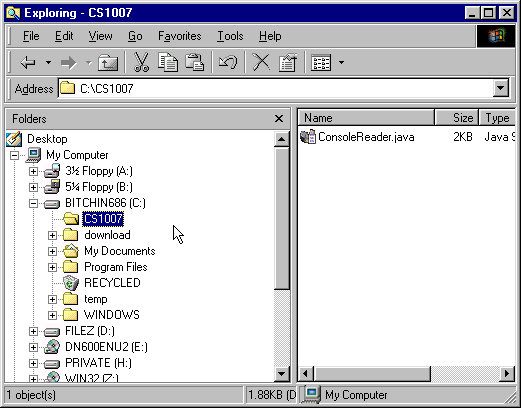
Jbuilder is a bit more picky about file locations than Emacs was. In order to use it effectively, you will have to make a folder to house all of your java projects. For the purposes of this tutorial, the folder 'C:\CS1007' will be used.
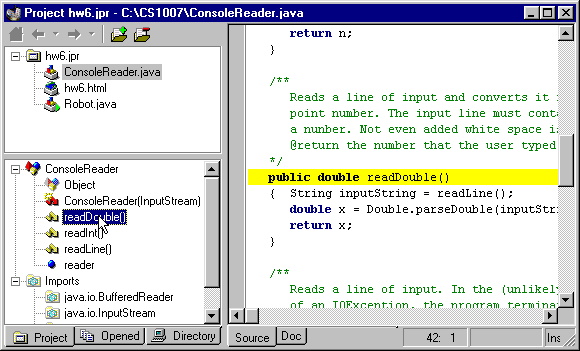
It is a good idea to keep ConsoleReader.java in your folder. Just click the link and save.
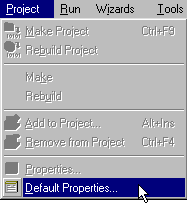
Before you start making projects, you will want to change some of JBuilder's settings. Choose 'Project' - 'Default Properties...' from the menu bar.
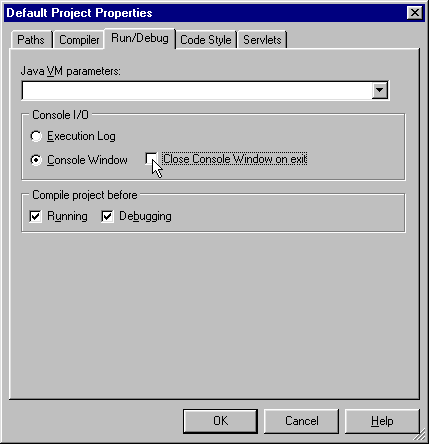
Select the 'Run/Debug' tab and remove the check mark from 'Close Console Window on exit.'
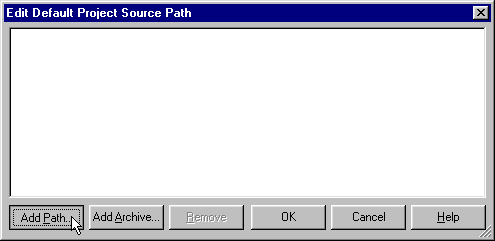
Select the 'Paths' tab and click on the ellipsis following the 'Source' path.
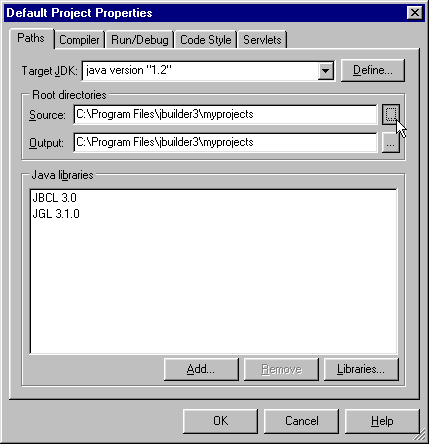
You will need to remove the path that is listed here.

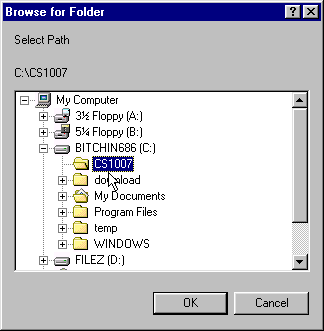
Then add a new path
Choose the folder that you created in the beginning.
Hit OK to return to the 'Default Project Properties' dialog, then choose the same folder for the 'Output' path.

JBuilder is now set up. Continue on to 'Creating a Project'
Every program that you make will require it's own project file. You create a project by going to File - 'New Project...' This brings up a dialog box:
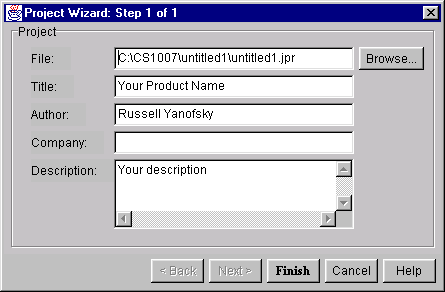
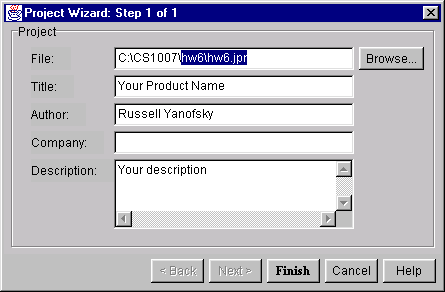
The Title, Author, Company and Description fields are all optional. But you will need to specify a file and folder name. The best thing to do is to keep each project in a folder of its own. In the box below I created a project called 'hw6.jpr' inside a folder called 'c:\CS1007\hw6'. JBuilder will create this folder if it doesn't exist. It will also automatically add the '.jpr' extension if you accidentally delete that.
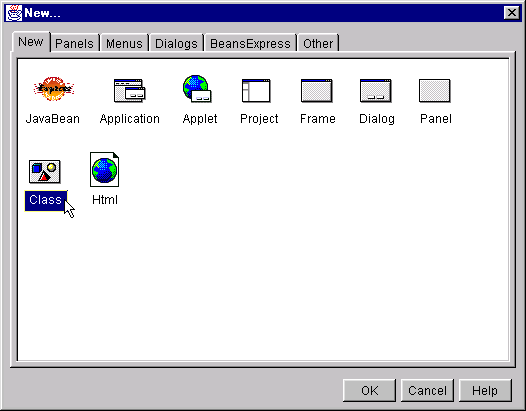
When you hit finish, JBuilder will display a window representing the new project it created. Right now the project is empty, so you will probably want to add a new class by going to File - New..., then choose the 'Class' icon and hit 'OK'.
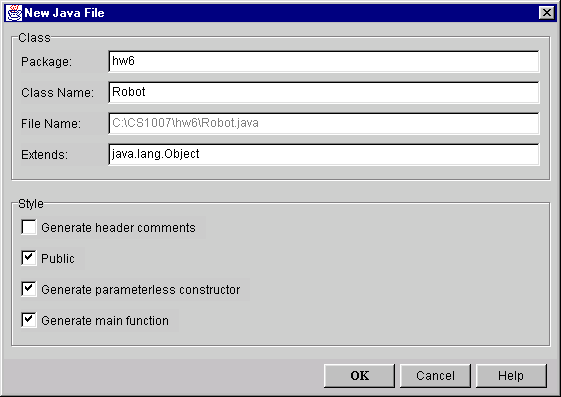
You can specify a class name here. You can also fill in the Extends field and choose some options at the bottom if you want JBuilder to automatically generate some code. DO NOT CHANGE THE PACKAGE NAME. You can modify this in the source later on. If you change it now, it will put your file in the wrong folder.
Aside from creating new classes, you can also include classes that have already been written. Do this by clicking the folder with a green plus sign, or choosing 'Project' - 'Add to Project' from the main menu.
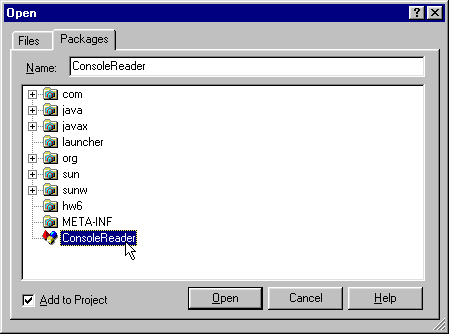
The 'Packages' tab lists all of the packages available in Java. Notice it also includes classes from the CS1007 directory specified in beginning. To add something just select it and hit OK. The example below adds the ConsoleReader class to the project.
(To add files not shown here, just choose the 'Files' tab and locate them by file name)
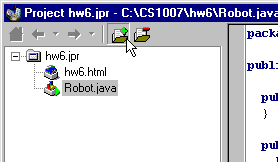
The Project now contains two java source files: 'Robot.java' and 'ConsoleReader.java'. To switch editing files, just click on the file name in the top- left pane.
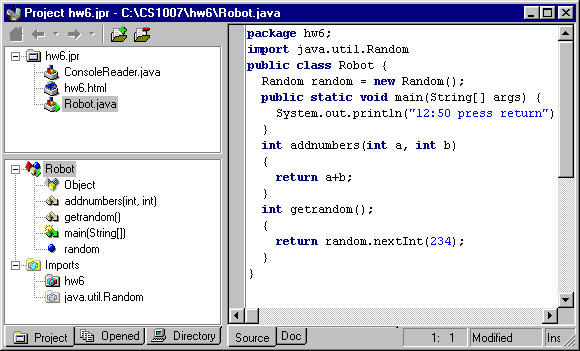
I added some new methods to the Robot.java file
The bottom-left pane lists all methods and variables in the current file. When you click on anything here, JBuilder will jump to that a spot in the code and highlight it in yellow. This helps you find things in your code more quickly.
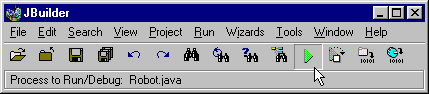
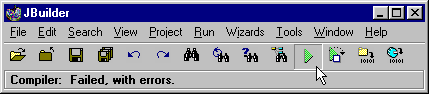
To compile and run your project, click the green play button on the JBuilder toolbar.
If there are any compile-time errors in the program, they will appear in the bottom-right pane. Double clicking on an error message will jump to that point in the code and highlight it.
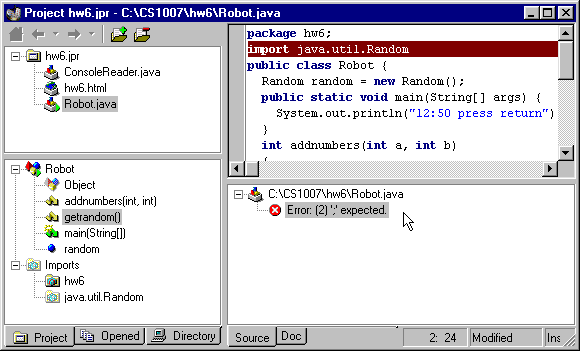
After you clean up the errors, you can try to run it again.
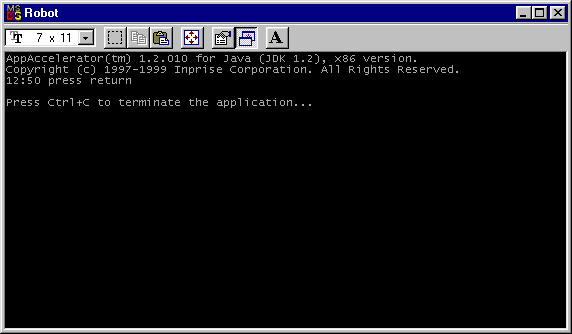
The program output appears in a console window. It will pause when the program is finished and close when you hit Ctrl-C.
To compile without running, choose one of the 'build' options on the Project Menu.
Links
JBuilder University Edition - Official Borland Site
Back to Main